Use OneLogin as your SAML IDP to enable WordPress SAML SSO using the WP Cloud SSO plugin.
Configure an app within your OneLogin portal and add your OneLogin SAML data into your WordPress website, creating a trust which will enable SSO for WordPress. Map OneLogin users to WordPress roles and sync OneLogin attributes. This will secure logins to your WP logins.
Getting Started Setting Up WordPress SSO with OneLogin
Table of Contents
1.) Setup OneLogin as IDP for WordPress
To configure OneLogin as IdP please follow the steps below:
Configure OneLogin as IdP:
In the WP Cloud SSO plugin, go to Service Provider Metadata section, where you find the SP metadata, such as SP Entity ID and ACS ( AssertionConsumerService) URL which are necessary to configure the Identity Provider;
Go to the Administration page from the OneLogin main page;
Click on the Applications button and click on the Add App;
Insert SAML Custom Connector into the search field;
Select SAML Custom Connector (Advanced);
Enter Display Name and click on the Save button;
Insert values from the Service Provider Metadata page of Plugin following as on the screenshot;
Click on the Save button;
Assign users to the application:
Click on the Users button;
Select the necessary user;
Click on the Applications button;
Click on Add Application button;
Select the necessary application and click on the Continue button;
In the next window click on the Save button;
In the WordPress WP Cloud SSO plugin, go to the Identity Provider Setup tab.
There are 2 ways to configure the WordPress SSO plugin:
Free Plan
Premium/Enterprise Plan
Free Plan
Manual OneLogin IDP Configuration:
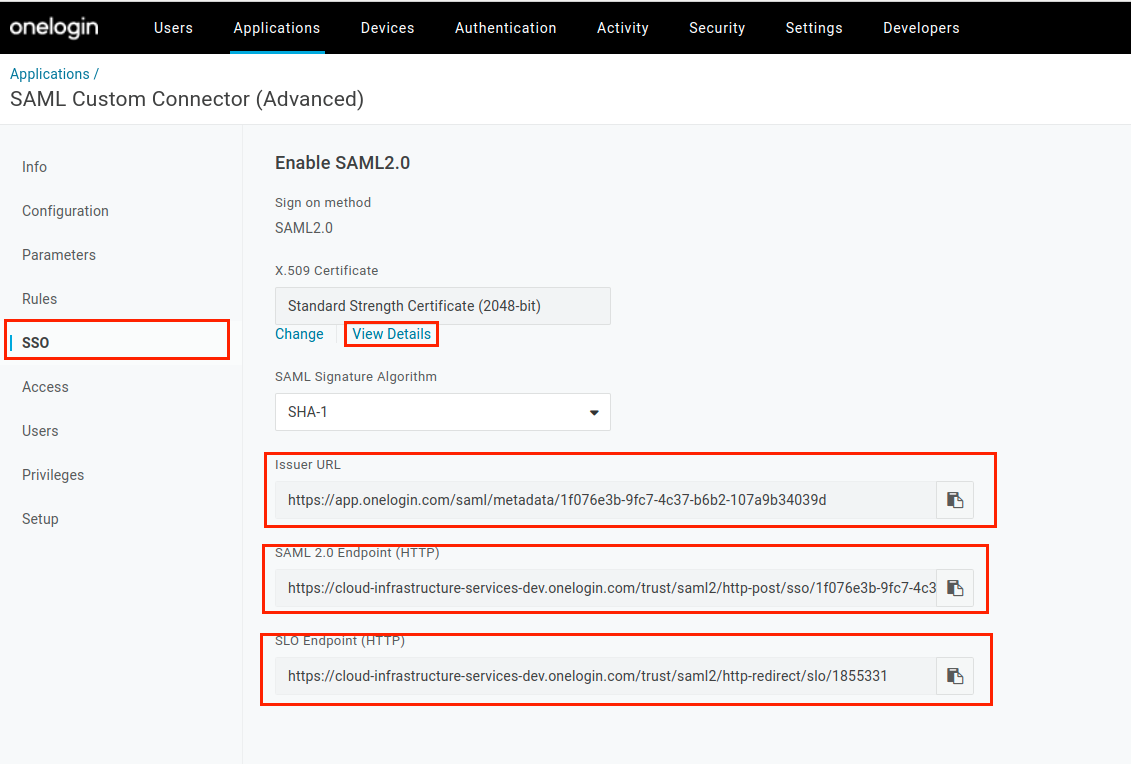
Go to your application in OneLogin;
Click on the SSO button;
Remember these fields to insert in the Plugin
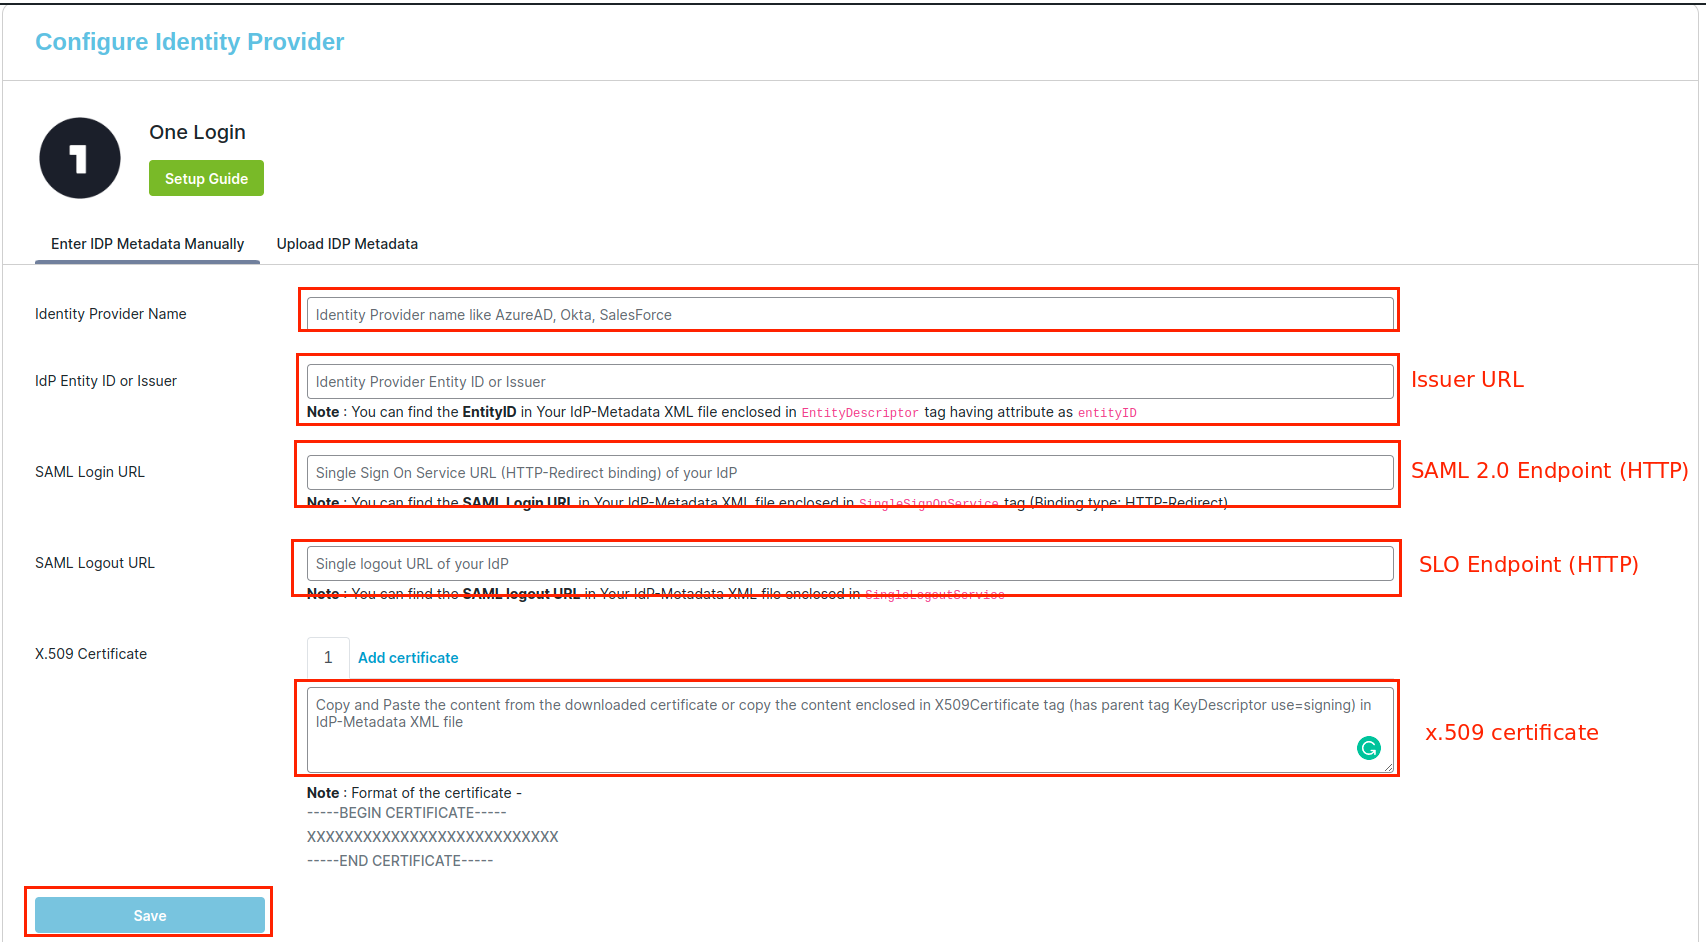
Go to the Identity Provider Setup page of Plugin;
Click on OneLogin identity provider;
Insert values from the OneLogin SSO page following as on the screenshot;
Click on the Save button;
Premium/Enterprise Plan
Upload OneLogin IDP Federation Metadata XML File:
Note: The upload feature is only available to paid plans. Refer to the Free Plan tab which allows you to configure manually.
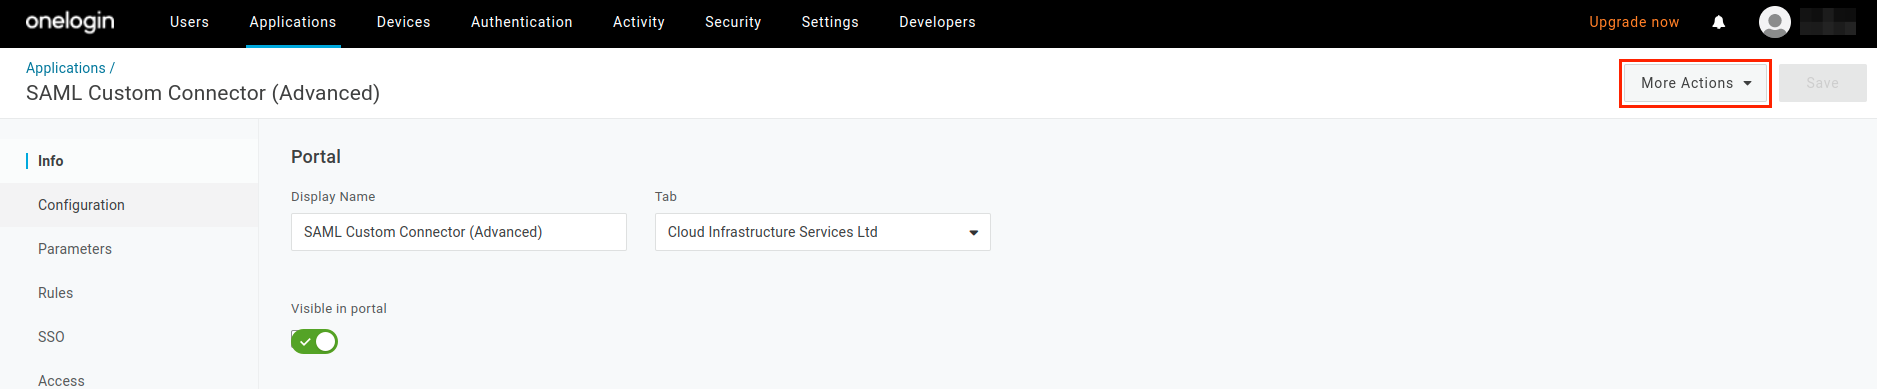
Go to your application in OneLogin;
Click on the More Actions button and click on the SAML Metadata;
Metadata file will be downloaded;
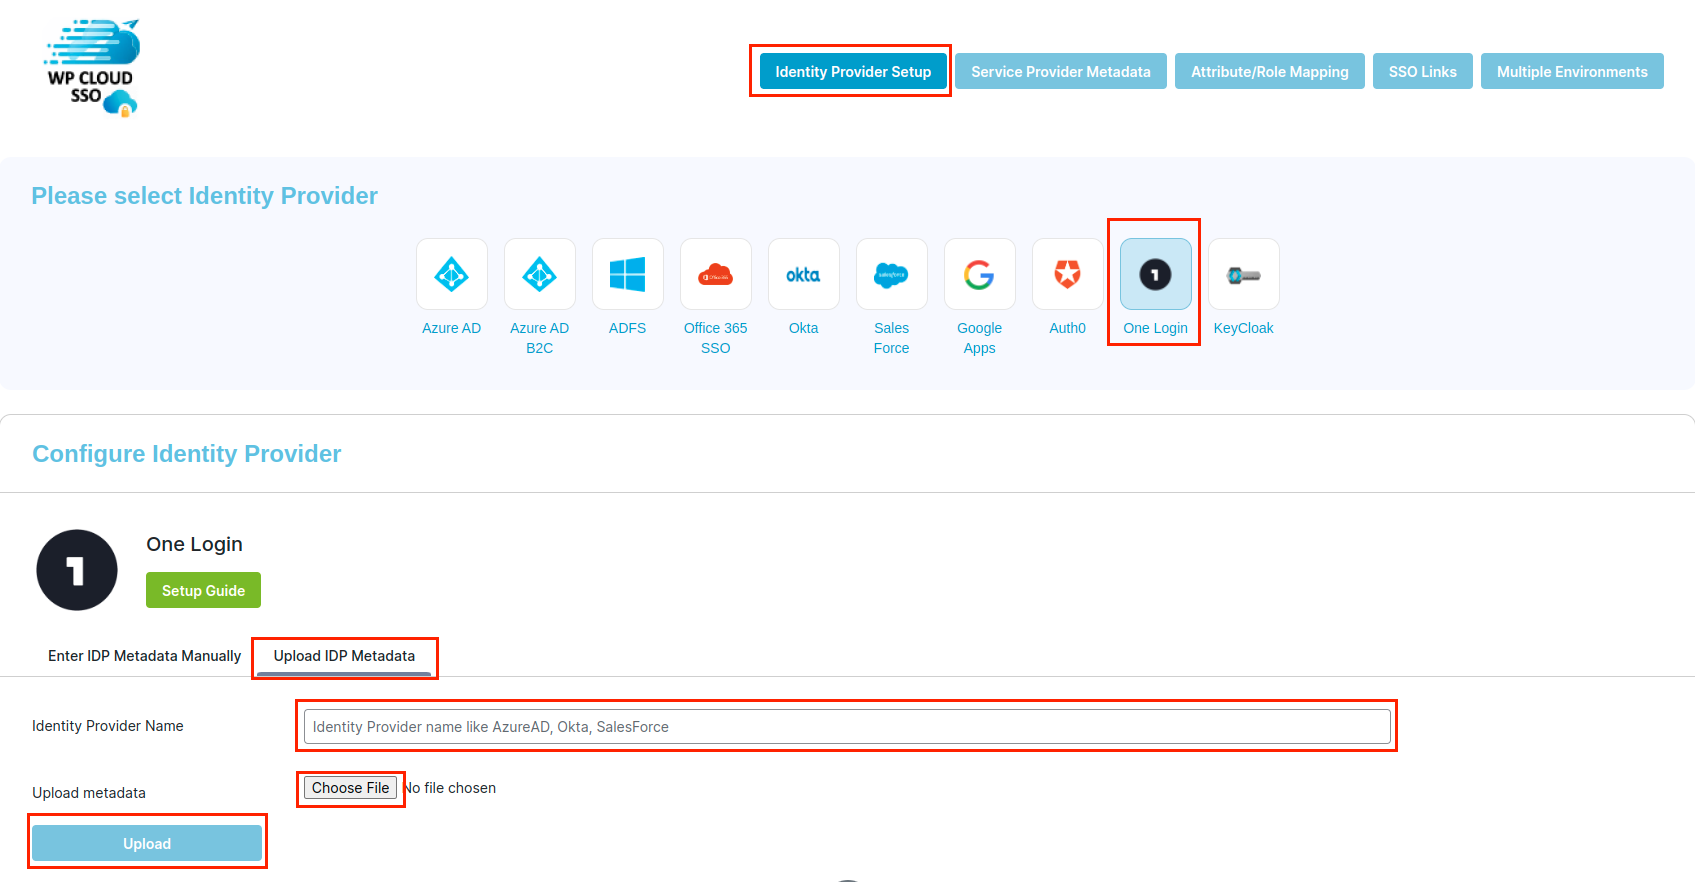
Go to the Service Provider Setup page of Plugin;
Click on OneLogin identity provider;
Click on the Upload IDP Metadata tab;
Enter Identity Provider name;
Choose the metadata file downloaded from OneLogin
Click on the Upload button
3.) OneLogin Attribute Mapping
Note: Attribute mapping feature is only available to paid plans.
Go to the Parameters tab in the OneLogin application;
Click on the Add new button;
Enter Field name;
Select the “Include in SAML assertion” option;
Click on the Save button;
On the next window select the value for the attribute, for example, First Name;
Click on the Save button;
Go to the Identity Provider Setup page of Plugin;
Select configured OneLogin identity provider;
Click on the Test Configuration button;
Login via the OneLogin account that is assigned to the OneLogin application;
See that attribute was successfully fetched from OneLogin;
Go to the Attribute/Role Mapping page of the plugin;
Insert firstName attribute to the necessary field of the Attribute mapping section related to default WordPress user attributes;
Click on the Save button;
Congratulations! You successfully set up attribute mapping for the firstName attribute from OneLogin. After login via OneLogin identity provider to WordPress user attribute firstName will be successfully mapped to users. Repeat this setup to other necessary attributes.
4.) OneLogin Role Mapping
WordPress has 7 pre-defined roles :
Administrator
Editor
Author
Contributor
Subscriber
Customer
To configure default role mapping please follow the steps below:
Go to the Attribute/Role Mapping page of the Plugin;
In the Role Mapping section select one necessary role of the WordPresspre-defined role;
Click on the Save button.
5.) OneLogin SSO Login Button - Redirect to IDP
Next is to enable your OneLogin SSO login buttons, which can be found on the SSO Links tab. Follow the SSO Login Widget page for instructions on setting up.