How to use FileZilla FTP to upload files to WordPress server. FileZilla provides a fast and simple way to upload files to your WordPress server. It’s the perfect alternative to using the WordPress dashboard. In this article, we’ll cover the basics of setting up FileZillaFTP and using it to upload files from your computer.
This FileZilla tool is an open-source File Transfer Protocol (FTP) software that helps transfer files from your desktop to a web-based server and vice-versa. The software has a client-server architecture with two programs – FileZilla Client and FileZilla Server. FileZilla is free, but a paid version is available for professional use (FileZilla Pro).
With FileZilla Pro, you can connect to third-party storage providers, including Amazon S3, Microsoft OneDrive, WebDAV, Google Drive, Backblaze B2, and Microsoft Azure Blob.
You can use either version of FileZilla to upload files to your WordPress server. But for this tutorial, we’ll use the free version. The process is the same for both.
File and Folder View – FileZilla allows you to modify folders and files and provides a drag and drop feature between local and WordPress server directories.
Intuitive User Interface – the friendly GUI allows even newbies to navigate through the utility.
Bookmarking – You can bookmark sites that you connect to frequently. This allows you to connect to the sites fast without entering the login credentials.
Data Comparison – You can compare files and data to ensure you have the latest copies. This way, you eliminate the chances of data duplication.
Bandwidth Management – FileZilla allows you to configure bandwidth options to adjust data transmission speeds.
You can configure Secure Proxy to support basic single sign on on the WordPress site.
Secondly, FileZilla is one of the most trusted FTP agents for transferring files between your PC and WordPress server. Here are the reasons you should consider FileZilla.
Free and Open Source: FileZilla comes as a GNU license, so you don’t need to pay to download and use it. You can also customize it to suit your unique requirements.
Easy to Use: FTP software is usually hard to configure and manage. FileZilla comes with a simple user interface that makes it easy to configure and transfer files. Even beginners will find their way around the software without too much hassle.
Supports Multiple Languages: FileZilla supports some of the most popular languages in the world, including English, French, Spanish, German, Japanese, and others. You can use the language you’re most comfortable with.
Cross Platform: You can use FileZilla with Windows, Linux, and Mac OS. Only a few FTP utilities offer this feature.
Next section is to learn how to Use FileZilla FTP to Upload Files to WordPress Server.
Using FileZilla FTP to Upload Files to WordPress Server
Remember that under normal circumstances, you don’t need to use an FTP to upload files to WordPress. However, you might need to under the following circumstances:
You can’t access your site’s admin dashboard due to a hack or an error.
When installing themes and plugins that you can’t upload via the WordPress admin dashboard.
You want to deactivate themes and plugins manually after they’ve caused a problem on your website.
There is a need to batch upload files to WordPress.
If making changes to core files such as WP-config and .htaccess.
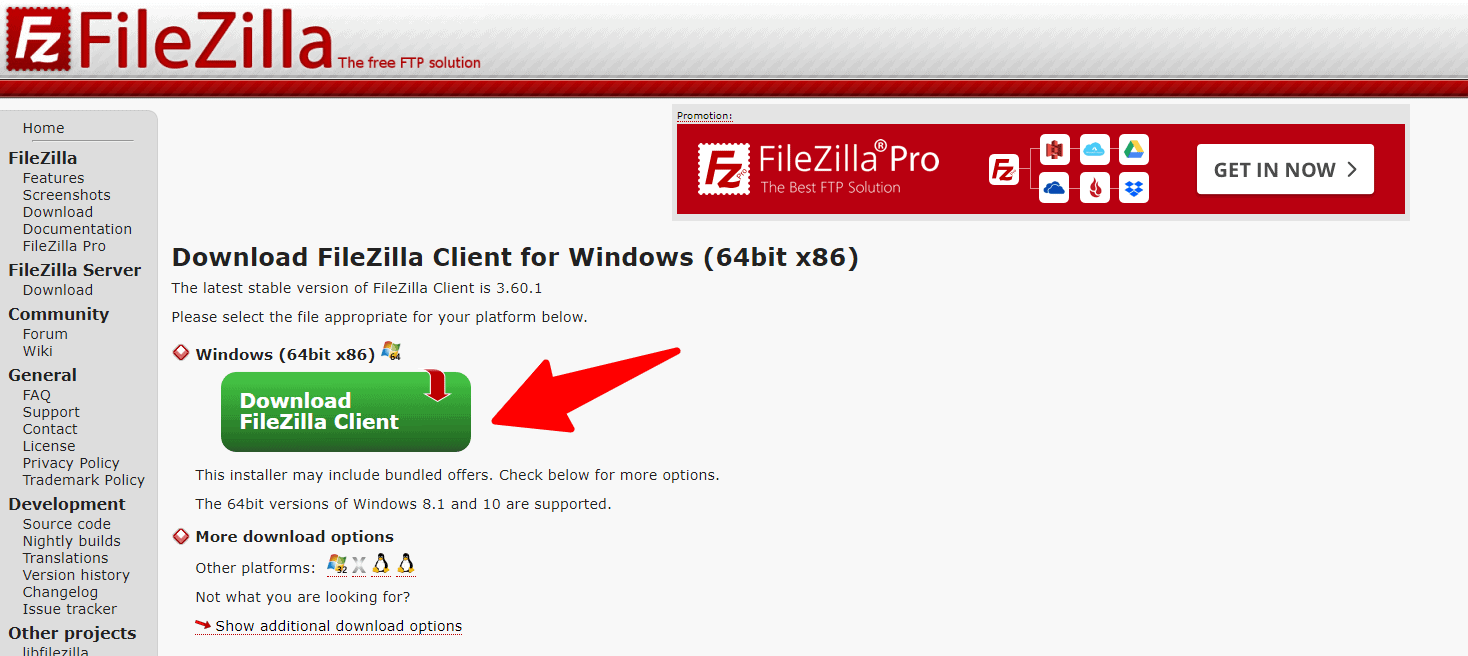
A)First step is to Download the installer version of FileZilla Client for Windows OS. You’ll need to select the edition of FileZilla you’d like to download. Also, there’s an option to download FileZilla along with the manual if required.
B) Secondly once the download is complete, double-click on the file to start the installation. FileZilla will show a License Agreement. Read the agreement and click I Agree to accept the terms and proceed with the installation.
C) Thirdly, the installation wizard will guide you through the FileZilla setup options in the next few steps. You can stick to the default settings or customize them based on your needs. Click Next until you see the Install button.
D) Now click on the Install button. The installation will take a few seconds, depending on your PC specs. Once the process completes, click Next.
Using FileZilla to upload files to your WordPress server is a straightforward process. Here’s a step by step guide.
Start FileZilla
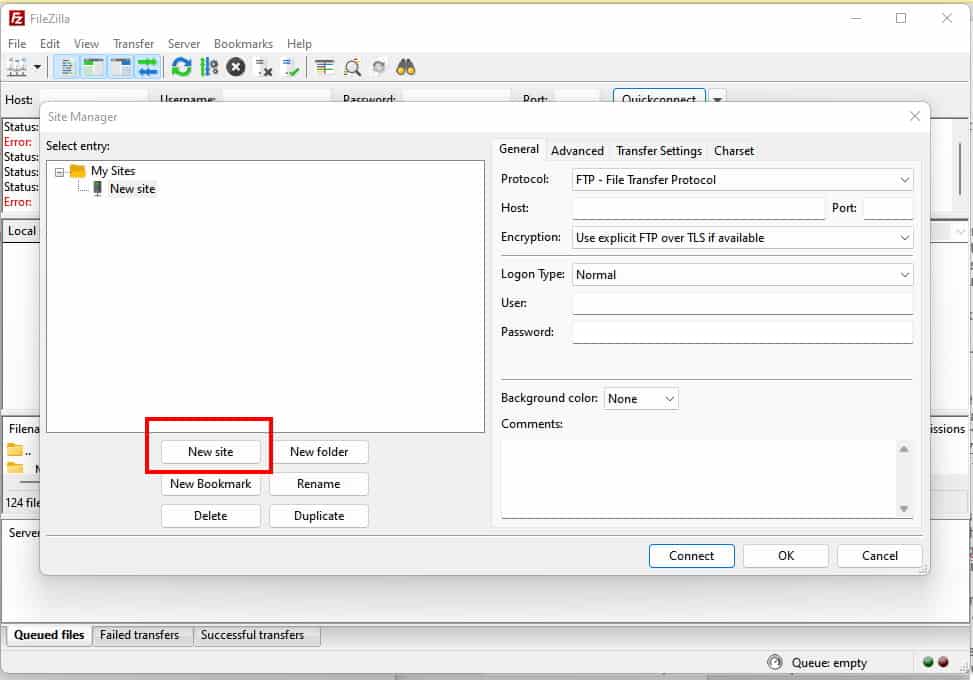
1. To start launch FileZilla Client and open Site Manager under File. Click on New Site to add your WordPress Website.
Name your site
2. Next, give the new site a name and enter the login credentials of your WordPress server. You’ll find this information in the Control Panel. You can also contact your host to request for this information. Enter the Host name/IP address and Port Number.
4. If you’re connecting for the first time, you’ll see a pop up asking you to verify the certificate. Click OK to proceed.
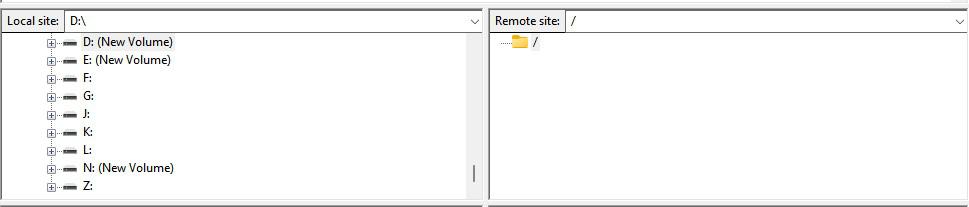
5. On the main page of the FileZilla client, your WordPress website files will populate under Remote Site on the left panel. Here, you can navigate to any file or folder on your WordPress server. You can access your local files on the right panel under Local Site.
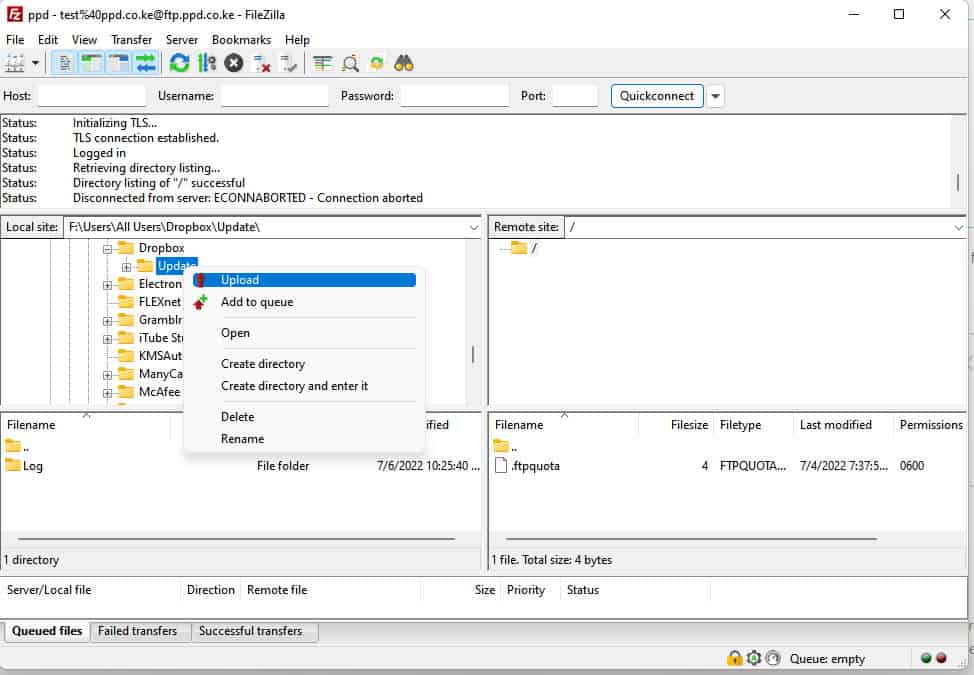
Upload files to WordPress
6. To upload files to your WordPress server, right click on any file under Local Site. Click on Upload on the menu to start uploading. Alternatively, you can drag and drop files from your local server to your WordPress server.
7. You have finished! Great! We have learned How to Use FileZilla FTP to Upload Files to WordPress Server. Let’s conclude
How to Use FileZilla FTP to Upload Files to WordPress Server Conclusion
In summary using FileZilla FTP is a great way to make changes to your WordPress site. It’s particularly handy when you’re unable to make the changes from the WordPress dashboard.
Whatever the reason for using FileZilla, it’s important to make a backup of your WordPress files before you begin. Note that you risk damaging your website when using FTP, so taking precautions is advisable. Should anything go wrong, you can always restore the backup you made and get your site back up and running in no time.
Overall, using FileZilla FTP to upload files from your computer to your WordPress server is a fast and simple process.
Why don’t you take a look at our content about FTP servers and Filezilla here
The world’s biggest problems can be solved by progressively solving the little ones. I write to help people solve the “little” tech problems they face.
00votes
Article Rating
Subscribe
Login and comment with
I allow to create an account
When you login first time using a Social Login button, we collect your account public profile information shared by Social Login provider, based on your privacy settings. We also get your email address to automatically create an account for you in our website. Once your account is created, you'll be logged-in to this account.
DisagreeAgree
Login and comment with
I allow to create an account
When you login first time using a Social Login button, we collect your account public profile information shared by Social Login provider, based on your privacy settings. We also get your email address to automatically create an account for you in our website. Once your account is created, you'll be logged-in to this account.